Faceworm Nest

| Faceworm Nest | |||||
|---|---|---|---|---|---|
| Requirements | |||||
| Base Level: | 140 | ||||
| Party: | 1+ Member | ||||
| Rewards | |||||
| Item(s): | Up to 6
Varies | ||||


Notes:
- Players can't re-enter this instance if they happen to exit it before the instance is done (e.g. disconnected, died then respawn). It is suggested to bring Tokens of Siegfried in case the players die in the middle of the instance.
- Most of the monsters here are Insect race and Poison elemental. The invisible minions are Formless race.
- Bringing various elemental armors and element-proof potions will help players survive damage from the Faceworm Queen.
- Poison or Undead armor will nullify the numerous poison damage in this instance. In case both are unavailable, Shadow armor will still be able to reduce poison damage but only by half.
- Alice carded shield helps for the mini boss and final boss fights.
- Spell Breaker can be used to interrupt various enemy skills and deal damage.
- Easy mode is used for farming since it is more efficient and faster, while Hard mode is used for leveling from 140 to 155.
Instance Information
The Faceworm Nest instance is located at the right of the two large areas in the bottom left pathway in the Dimensional Gap . The instance needs to be completed within 1 hour. It can be done solo or in a party, and the difficulty setting can be chosen in the beginning when talking to Chaos.
There are three NPCs related to the instance; the Magic Scholar, the Old sign, and the Interdimensional Device. The Magic Scholar will create the instance when the party leader speaks to him.

The Old sign shows players fastest completion time of the Faceworm Nest instance along with the name of the party leader and how many people were in the party. If a new record has been made, it will be broadcasted to everyone in the server. The Interdimensional Device allows the party to enter the instance when spoken to.

Inside the Faceworm Nest are Faceworms to kill. There are four main types of Faceworms to kill, three of which are required to be killed in order to move on.
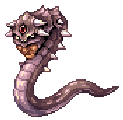
- Regular Faceworms
- Dark Faceworms (will have varying skills depending on the area they are encountered)
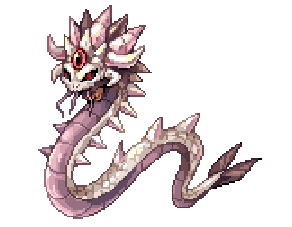
- Faceworm Queen (info in part 5)
- Faceworm Larva (traps, not necessary to kill)
Note: For additional monster stats, you can refer to the Monsters List at the end of this guide
Instance Cooldown Quest Name
Faceworm's Nest after-effects
Walkthrough
The Faceworm Nest instance is divided into five parts.
Each phase will spawn a set amount of Faceworms that need to be eliminated to proceed. Once all Faceworms are eliminated or only less than 3 of them remain, the Dark Faceworm mini-boss will be summoned.

- When the mini-bosses are killed, a Treasure Chest appears nearby that can be opened to drop a garment, Giant Faceworm Snake Skin, or the slotted version Giant Faceworm Snake Skin [1]. This garment will come pre-enchanted, possibly pre-refined, and also possibly slotted. The difficulty mode and how fast each part is completed will determine the level of enchants the Giant Faceworm Snake Skin will have. Choosing Hard Mode and having a faster completion time of each part will give the garment better enchants, higher refine rates, and a higher chance to be slotted. The garment can have up to three enchants, ranging from 1~5 on each stat twice while the garment the Faceworm Queen drop can have a stat up to 7, and a possible Special Stat enchant, which are similar to the Special Stat enchants obtainable on Fallen Angel Wings.
- Each section's timer won't start until the player talks to Chaos, so the players can prepare beforehand by clearing the Faceworm Larva first and splitting up the party into various positions.

- Present around the map are Suspicious Mounds of dirt. Walking near theses will trigger up to 3 Faceworm Larva to appear, except while being invisible (e.g. Hiding, Cloaking, Camouflage, etc.). Though they do not need to be killed to continue the instance, it is advised to get rid of them quickly as they move fast and will overwhelm players with their fast attacks. The Faceworms may take some time to kill, having over 450,000+ HP each and can hit for a lot, but are generally slow.
- Also scattered around the map are Savages, Greatest Generals, and Beetle Kings, which do not need to be killed.
Phase 1
Once inside the instance, players will appear somewhere in Payon Forest (pay_fild10). Chaos and Iris will be found directly south of the entrance. Have the party leader talk to Chaos to initiate a brief conversation with the duo and choose the difficulty mode. Once the dialogue ends, Faceworms will start to spawn all around the map.

- Easy Mode will spawn 33 Faceworms per phase, and the bosses will only spawn with around half HP. Used for farming.
- Hard Mode on the other hand will spawn up to 143 Faceworms per phase. Used for leveling mostly.

- Once the Faceworms are eliminated, a Dark Faceworm will spawn in the bottom right area of the zone. This Dark Faceworm has 5 million HP. It will constantly spawn Faceworm Eggs around itself that will then attempt to hatch with a visual cast bar. Once the cast bar finishes, the eggs will spawn 1 Faceworm Larva each. Afterwards, the eggs will break and heal the Dark Faceworm.
- After the Dark Faceworm is defeated, a Treasure Chest will appear nearby, and a portal will open up near the bottom right area near the large rock pile where the Dark Faceworm had spawned. Proceed through the portal to enter part 2 of the instance.

Boss Fight Tips - Eggs:
- Interrupting the Faceworm Eggs' casts with the Spell Breaker skill will prevent them from hatching Faceworm Larva. Nonetheless, it would be desirable to directly break the eggs instead to also prevent them from healing the Dark Faceworm.
- Eggs can be knocked back, so stacking them and using AoEs is efficient way to break them
- The Dark Faceworm initially only spawns 2 eggs while its HP is between 50%-100%. Once its HP falls below half, it will start spawning 4 eggs each time.
- The amount of HP the Dark Faceworm recovers from the eggs is dependent on how many of them survive:
- 4 Eggs will heal it for 450,000 HP
- 3 Eggs will heal it for 165,000 HP
- 2 Eggs will heal it for 60,000 HP
- 1 Egg will heal it for 21,600 HP
Phase 2
Talk to Chaos and Iris once again. They will have a short talk about Faceworm hunting, how the Faceworms' skin is actually valuable, and how skilled hunters can yield Faceworm skins of higher quality through faster kills. After they finish talking, the Faceworms will appear and the players will need to eliminate them once more.
- This area will have more suspicious mounds of earth than in the previous phase, most of which will be hidden underneath foilage, so it would be best to move through the area slowly if facing the Faceworm Larva is dangerous.
- Once the Faceworms have been eliminated, another Dark Faceworm will spawn in the northern area of the map. Like before, this Faceworm has 5 million HP. This Dark Faceworm variant will frequently spawn invisible eggs that cast Water Ball, which can overwhelm unprepared players, but may be easily mitigated by wearing water element armor and drinking a
 Coldproof Potion. Once killed, the second treasure chest will appear. The portal to the next area will appear at the very south of the map, to the right of the portal that was used to enter part 2.

Note: this only shows 1 out of 4 total waterballs being simultaneously casted at the same time.
Boss Fight Tips - Waterball:
- The waterball actually comes from invisible eggs and not from the Dark Faceworm itself; so, although wearing magic reflect gear will return incoming damage, the reflected damage won't contribute to defeating the Dark Faceworm at all.
- Since the waterball-eggs are stationary and their range is limited, it is possible to avoid their damage completely by luring the Dark Faceworm away from where the eggs spawned.
- One way to detect when the eggs are present is when an entity shadow or a "Miss" notification appears in an empty space on the ground. The shadow only remains visible for a few of seconds when the invisible eggs newly spawn, but the "Miss" can be seen when the player walks in range of the eggs (this is when they start casting waterball). It can also be revealed with skills like Ruwach, Sight, and Oratio. However, Maya Purple card does not show them because they have no sprite.
- Just like the Dark Faceworm in the first phase, this one initially only spawns 2 invisible eggs while its HP is between 50%-100%. Once its HP falls below half, it will start spawning 4 eggs each time.
- Alice card helps reduce damage from waterballs because the invisible eggs are boss protocol. Otherwise, anti-small and anti-formless reduction helps too.
Phase 3
Talk to Chaos and Iris again. They warn that the valley up ahead is filled with deadly poison so you must proceed with caution. They decide to go check a different area instead and you split up from the pair.
A high number of poison sacs will now constantly spawn when players are in certain areas. These poison sacks have a very slow timer, that, when reaching zero, will cause them to explode and deal moderate Fire property damage, so the players should move away from them. Although the damage can be avoided with either Kyrie Eleison or Hide, standing near too many poison sacks can prove fatal if unavoided. However, the poison sacks can be killed fairly easily. Just like with suspicious mounds of dirt, being invisible won't cause the poison sacs to spawn. The narrow canyon area in the first half of this zone won't have any Faceworms. Follow the path north to the large open area to find Faceworms to kill, while also being careful of the poison sacs.
- The Dark Faceworm will spawn in the north area with 5 million HP as before. This time, instead of eggs, poison sacs will appear to help hinder players and heal the Dark Faceworm. Once killed, the third treasure chest will appear and the portal to part 4 will appear in the bottom right inside the canyon.
Note: Poison sacs will continue spawning if players are in certain areas so proceed to the next area with caution.

Boss Fight Tips - Poison Sacs:
- When exploding, the poison sacs deal fire-property damage and knockback to everything around it. This means it can also damage Faceworms, Faceworm Larvae, and even the Dark Faceworm itself that spawned them. While it can be dangerous wearing anti-knockback gear as it will cause the player to take damage from multiple exploding sacs, it can be equally as dangerous to not wear them as the player can get knocked back into other exploding poison sacs.
- When dropping the Poison Sacs, the Dark Faceworm will preemptively heal itself for somewhere around 30,000 ~ 105,000 HP(?).
Healed amount = [(Random number between 30 ~ 105) x 1,000] - The sacs are stationary, so it is easy to avoid their damage by simply keeping distance from them at around 5 cells away.
- Be careful when approaching poison sacs from off-screen as you won't be able to see their timers anymore
- The sacs can be damaged and easily taken out by pre-placed skills like traps, Magnus Exorcismus, Blaze Shield, etc.
- Players with HP/SP Absorption gear may be able to make use of the poison sacs to easily recover throughout the fight.
Phase 4
Still no sign of Chaos and Iris. Instead, large clouds of bubbly poison (officially called fatal poison zone) fills numerous areas of this part. Approaching the center of any of the poisons will deal continuous "neutral" damage at a high rate, killing players rapidly. This damage can be avoided with Kyrie Eleison, Perfect Dodge, Safety Wall, and Hide like the poison sacks in part 3, but it is better advised to avoid walking too close to the centers. Kill all the Faceworms in this area, while being careful of the poison. Since the poisonous area can heal the Faceworms, it is advised not to fight them inside it.
- The Dark Faceworm spawns in the west area this time. This variation will constantly produce Poison Clouds around itself. Avoid the poison if possible while killing the beast. When this Faceworm dies, the fourth treasure chest will appear, along with a portal on the north-west that will lead to the final area.

Boss Fight Tips - Poison Clouds:
- The Fatal Poison Clouds deal slow Poison physical damage as an AoE to all players inside its range, but it also deals non-elemental physical damage as a rapid auto-attack at its center. Their damage can be easily avoided by stacking high amounts of Flee and Perfect Dodge on top of Undead/Poison armor and in conjuction with defensive skills.
- Alice Card helps again wonderfully for this as the center of the cloud that does rapid normal physical damage is boss protocol. Otherwise, Anti-Small or Anti-Formless reduction helps too.
- The poison clouds will heal all Faceworms for around 2,000 HP for every second they stay inside the cloud.
Phase 5
Iris and Chaos are here now, and once the party leader talks to them, the Faceworm Queen will soon spawn. The Faceworm Queen proves to be a formidable foe with her high amount of HP and devastating attacks. She has an extraordinarily high amount of HP, 28m + (2m*party members number) to be exact. She will spawn in her original Poison form, and can change her element randomly to Fire, Earth, Water, or Wind. An announcement will be shown when she does so.
Note: At any point during the fight, moving her too far from the center will reset her with full hp.
Elemental Forms:
- Poison - Default, White form. She constantly casts Pierce, Venom Dust, Critical Wounds, Close Confine, and Earthquake while in this form.
- Earth - Green form. She will constantly Heal herself in this form, as well as constantly cast Quagmire and Earth Drive under players. She will also sometimes use Earth Attack if the player is within melee range.
- Water - Blue form. Can cast Frost Driver, Wide-Freeze, Storm Gust, and Frost Nova while in this form.
- Wind - Yellow form. Can cast Lord of Vermillion, Thunderstorm, and Jupitel Thunder while in this form. She also has very high Flee and requires 755 HIT to hit her 100% of the time!
- Fire - Enraged Red form. She will enter this stage when she receives a large amount of damage in a short period. Upon enraging, she will instantly recover around 3.2m-10m HP and gain a boost to her movement speed and damage. She constantly uses a very strong screen-wide Earthquake. Dark Soul Strike, Hell's Judgement, and Pulse Strike while in this form. Strangely, all her attacks can be interrupted by hitting her except for Pulse Strike.
- Note: Spell Breaker Level 5 can be used to interrupt her skills and deal damage to her.
Special Skills:
Regardless of current form taken, the Faceworm Queen can also make use of all the mini-boss skills previously encountered in the other phases. The same tactics used to survive those fights may also be applied against the Faceworm Queen. If the battle drags out long enough, she may also start using multiple special skills at the same time. Note that invisible waterball and poison cloud monsters cannot be seen with Maya Purple card due to not having any sprite.
- Boss Fight Tips - Eggs
- The amount of HP the Queen recovers from the Eggs is dependent on the number of Eggs that survive:
- 4 Eggs will heal the Queen for 2,000,000 HP
- 3 Eggs will heal the Queen for 1,000,000 HP
- 2 Eggs will heal the Queen for 200,000 HP
- 1 Egg will heal the Queen for 100,000 HP
- The amount of HP the Queen recovers from the Eggs is dependent on the number of Eggs that survive:
- Boss Fight Tips - Waterball
- Boss Fight Tips - Poison Sacs
- When dropping the Poison Sacs, she will heal herself for somewhere around 60,000 ~ 600,000(?) HP
Healed amount = [(Random number between 6 ~ 60) x 10,000]
- When dropping the Poison Sacs, she will heal herself for somewhere around 60,000 ~ 600,000(?) HP
- Boss Fight Tips - Poison Clouds
- When used on their own, the poison clouds will heal the queen for 6,000 HP, but when spawned in conjunction with a different special skill, the clouds will only heal her for 2,000 HP
- Chaos will appear less often when the poison clouds are active
- While fighting the Faceworm Queen, Chaos will tell players to move the Queen to a certain direction. Doing so will allow Chaos to deal a high amount of damage to her, helping to kill her faster. Beware of moving her too far out from the center or she will reset with full hp.
- The amount of damage Chaos deals to the queen is around 260,000 ~ 2,180,000(?) HP.
Damage Dealt = [(Random number between 26 ~ 218) x 10,000]
Note: This damage is also included in the DPS-calculation that can trigger the queen's enraged mode.
- The amount of damage Chaos deals to the queen is around 260,000 ~ 2,180,000(?) HP.
After killing the Faceworm Queen, the final treasure chest will appear, which contains two Giant Faceworm Snake Skins. A Transport Device will also spawn to allow players to head back to the Dimensional Space.
- The players can now search for Merchant Prince's Box scattered throughout the instance, which give various loot when opened. The number and location of the treasure boxes is supposedly random.


Epilogue
- The player can now go to Payon and turn-in the Timeless Items received from Merchant Prince's Boxes for some experience.
Monsters List
| Faceworm Nest Monsters | |||||||||||
|---|---|---|---|---|---|---|---|---|---|---|---|
| Monster | Level | HP | Def | Mdef | Base EXP | Job EXP | 100% HIT | 95% Flee | Size | Element | Race |
| Savage | 59 | 2,301 | 126 | 3 | 535 | 457 | 280 | 281 | Large | Earth 2 | Brute |
| Beetle King | 55 | 2,061 | 79 | 8 | 489 | 413 | 302 | 275 | Small | Earth 1 | Insect |
| Greatest General | 55 | 1,575 | 114 | 30 | 466 | 413 | 285 | 253 | Medium | Earth 2 | Formless |
 Faceworm |
140 | 482,427 | 50 | 30 | 38,800 | 4,356 | 390 | 410 | Large | Poison 1 | Insect |
 Faceworm Larva |
145 | 260,380 | 10 | 10 | 10 | 13 | 395 | 495 | Medium | Poison 2 | Insect |
 Faceworm Egg * |
140 | 10 | 10 | 10 | 10 | 13 | 350 | 320 | Medium | Poison 1 | Insect |
| 151 | 10,000 | 200 | 100 | 0 | 0 | 451 | 421 | Small | Ghost 4 | Formless | |
 |
140 | 10,000 | 200 | 100 | 0 | 0 | ? | ? | Small | Poison 1 | Insect |
| |
151 | 10,000 | 200 | 100 | 0 | 0 | 451 | 421 | Small | Ghost 4 | Formless |
 |
144 | N: 2,500,000 H: 5,000,000 |
100 | 30 | 100,000 | 88,000 | 444 | 464 | Large | Poison 2 | Insect |
 |
155 | N: 25,000,000 H: 50,000,000 |
100 | 60 | 200,000 | 220,000 | 455 | 525 | Large | Poison 4 | Insect |
| 500 | 60 | 455 | 525 | Earth 1 | |||||||
| 100 | 400 | 455 | 525 | Water 1 | |||||||
| 100 | 60 | 755 | 525 | Wind 1 | |||||||
| 400 | 400 | 455 | 525 | Fire 1 | |||||||
Notes:
- * Faceworm Egg, Invisibile Waterball Eggs, Fatal Poison Zone only receive 1 dmg with each hit.
- Interrupting the Faceworm Eggs or breaking them before they finish their casts will prevent them from hatching Faceworm Larva.
- On Easy Mode, the Dark Faceworms and the Faceworm Queen will spawn with only around half of their max health (2.5m HP for Dark Faceworms, while the Faceworm Queen gets 28m + (2m*party members number) HP ).
- The Faceworm Queen has a total of 5 different forms (Poison 4, Earth 1, Water 1, Wind 1, Fire 1) that mostly share relatively the same set of stats except for a few differences (Earth = 500 Def, Water = 400 MDef, Wind = 755 Hit, Fire = 400 Def 400 MDef 2x Atk 3x MAtk).